When Installing or Replacing an Air Conditioner, Use These Procedures for the Refrigerant Tubing!
- Craig Migliacco
- Jun 9, 2021
- 6 min read
Updated: Feb 24
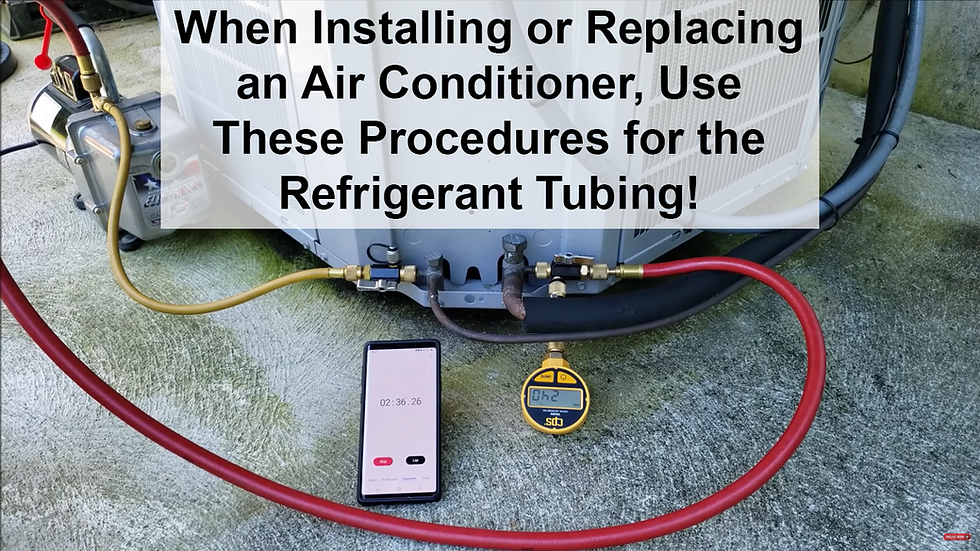
When installing a new HVAC system, replacing an existing HVAC system, or only replacing one part of the system, there is a sequence of procedures that must be performed for the refrigerant tubing to prepare for refrigerant.
When replacing an existing system, start at Procedure 1.
When installing a new system, start at Procedure 2.
Remember, under US federal guidelines, technicians must be EPA 608 certified before handling refrigerants.
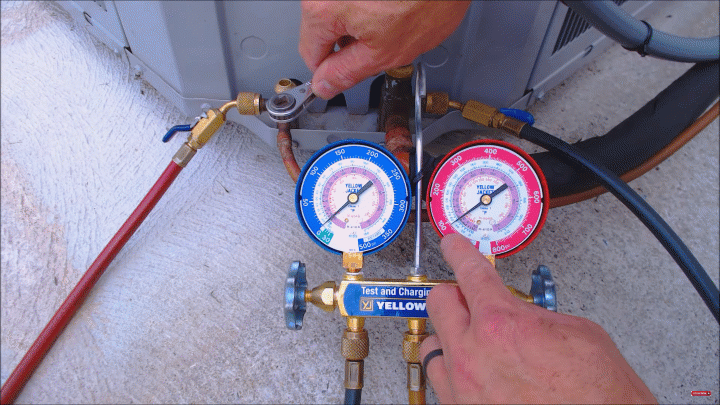
Procedure 1, Recover or Pump Down: In order to open an existing system to atmospheric pressure (0 PSI) for service, first recover all the refrigerant or pump down the refrigerant into the outdoor unit. After a system is pumped down, all the refrigerant is trapped in the outdoor unit behind the service valves. The pressure in front of the service valves is 0 PSI. We usually only pump down the refrigerant into the outdoor unit if the outdoor unit is going to be reused in its current condition.
Recovery and pump down guidelines can be found in the EPA Section 608. Presently, per these guidelines, high pressure R-22 or R-410A appliances must hold a vacuum level of 0 PSIG or lower after recovery or pump downs of systems with less than 200 lbs. of refrigerant. Typical residential systems have 3 to 15 lbs. of refrigerant in them. (I usually try to recover or pump down to 4”hg, unless there is a leak.)
DO NOT pump down a unit with a Scroll compressor because the refrigerant acts as insulation to separate the electrical motor windings from the ground frame inside the hermetic compressor. When reusing a unit with a scroll compressor, just shut the service valves and recover the rest of refrigerant in the line set. This is done to prevent the motor from getting damaged due to shorting to the ground frame.
Recovery Video - https://youtu.be/os9gKLf7LJg
Procedure 2, Valve Core Removal: A split system is usually shipped with the service valves in the closed position, with refrigerant trapped in the outdoor unit, and with no pressure at the access ports. Valve cores, also known as "Schrader Valves", are located at the service access ports. The valve cores (if equipped) should be removed (see photo below) from the ports prior to brazing the copper tubing at the service valves. This is done so the valve cores do not melt or become damaged during the soldering or brazing process. (For best results, valve cores should remain out until after all the procedures are completed, and refrigerant is in the unit. Make sure to use valve core removal tools during or after the pressure test, and moving forward through the procedures.)

Procedure 3, Brazing or Silver Soldering: The line set must be brazed, silver soldered, or connected using another method, such as crimp fittings or flares.
1) When brazing, use a 15% silver brazing rod and flow inert gas, such as nitrogen, through the tubing to reduce oxidation inside the tube. Nitrogen should flow through the tubing at 3 CFH. There should not be any pressure within the tubing. The nitrogen is just purging the air while heating the tubing for the braze rod to melt and seal the joint. When brazing, no additional flux is required. The phosphorus in the braze rod acts as the flux, so no acid enters the tubing. Use an air acetylene or oxy-acetylene torch for high temp brazing.
2) Use a propane or Mapp gas torch for silver soldering. When silver soldering, use Stay-Brite 8 and flux. You do not want acid inside the tubing. Therefore, use the least flux possible. When silver soldering, there is no need to flow nitrogen through the tubing because the tube does not become hot enough to create oxide.
Brazing at the Service Valves Video: https://youtu.be/GgBvzGhoesI
Brazing at the Evap Coil Video- https://youtu.be/7G1tj7KgdBk
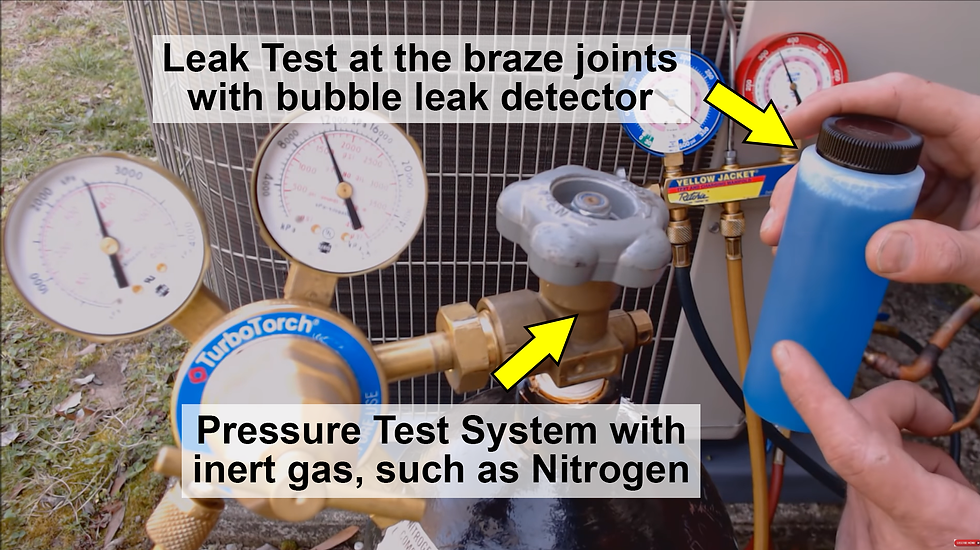
Procedure 4, Pressure Testing: The system must be pressure tested for leaks. The pressure must be less than the max design pressure that is listed on the low side rating plate. If the system is not new, it is important to only pressure test to a lower number than the max design pressure. Otherwise, the high test pressure will cause leaks to form. Hold nitrogen in the system for at least ten minutes to see if the pressure reduces, indicating a leak. Use a bubble leak detector (see photo below) or an ultrasonic leak detector to find any leaks. Pressure testing with a digital gauge set allows you to see a decrease in pressure faster and more accurately than when pressure testing with a compound manifold gauge set.
Pressure Test Video- https://youtu.be/2REIP5Ddn60
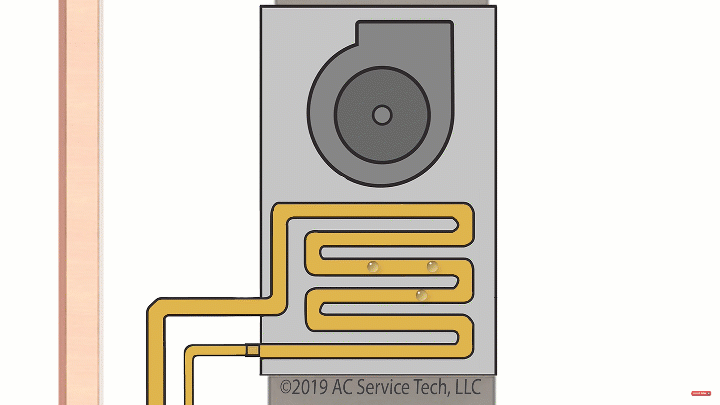
Procedure 5, Oil Blowout Procedure: If part of the system is existing and not new, an oil blowout procedure may be needed. If you are having a problem with the vacuum due to a glob of oil closing off the inside of the tubing, perform an oil blowout procedure. Run 100 psi of nitrogen for 5 seconds through the liquid line port and out the vapor port. This will blow the oil onto the inner walls of the tubing so that a vacuum can be pulled through the tubing.
Vacuum problems including Oil Blowout Video- https://youtu.be/Ks3MtPmXDUE
Procedure 6, Vacuuming: A vacuum is usually pulled from both ports of the system. Vacuum rated valve core removal tools should be used at each port, along with another valve core removal tool for valving off the vacuum gauge, if needed (see photo below). The vacuum must reach below 500 microns before isolating the pump from the rest of the vacuum setup. (I typically target 200-300 microns.)
Vacuum Video, Steps 6-10 https://youtu.be/wYZ8Wudksb0
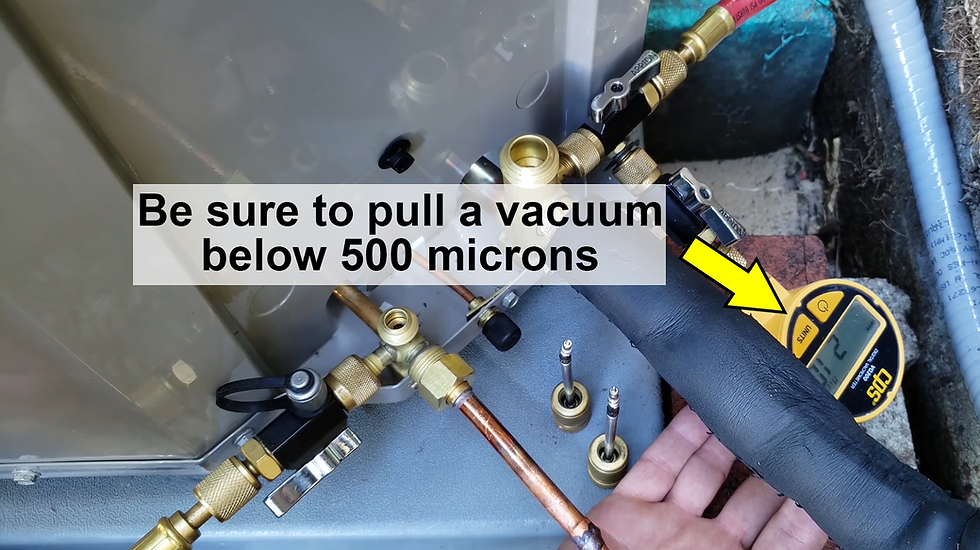
Procedure 7, Standing Vacuum Test: The standing vacuum test (otherwise known as a decay test) is held for 10 minutes. It is performed by first valving off the vacuum pump, before powering off the vacuum pump. The vacuum gauge is still connected to the system. It reads the true vacuum level. The vacuum level may initially rise as the vacuum equalizes across the tubing, but then it should remain stable. This initial rise may only be 100 microns or less. If the vacuum level does not rise above 500 microns after 10 minutes, this indicates that the system does not have leaks, or water, nitrogen, or air in the system. The system is ready for refrigerant. If valve core removal tools are used, the vacuum level may not rise at all.
Procedure 8, Valve off the Vacuum Gauge: Valve off the vacuum gauge so that oil and refrigerant do not contaminate the vacuum sensor for future use.
Procedure 9, Break the Vacuum with Refrigerant from the Bottle or System Valves: The vacuum is broken by adding refrigerant from the bottle into the liquid line, or by opening the service valves to allow refrigerant from the outdoor unit into the line set.
Vacuuming, Breaking the Vacuum with Refrigerant, Checking the Charge- https://youtu.be/PfdL3kZ3C6I
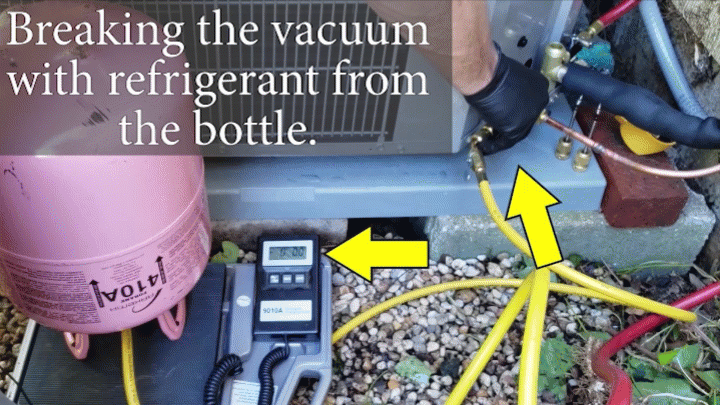
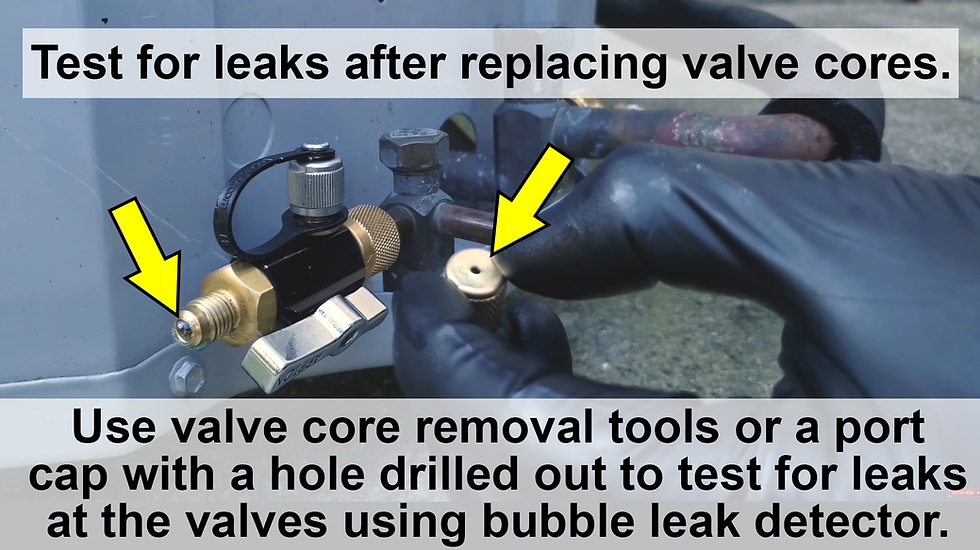
Procedure 10, Install The Valve Cores: The valve core removal tools are left on the ports before brazing, through pressure testing, through vacuuming, and they are used to replace valve cores after the system is at positive pressure. If valve cores are left in during the vacuum process, a deep vacuum may not be able to be pulled due to the restriction. After replacing the valve cores, test to see if the valve core is leaking, before removing the tool (see photo below).
Procedure 11, Attach Port Caps or the Gauge Set: Either install the caps onto the ports, or add a gauge set to check the charge. To add more refrigerant into the unit, the system must be running so that the pressure in the bottle is higher than the pressure on the vapor port. This will allow the refrigerant in the bottle to travel into the unit. Be sure to use a refrigerant scale in order to accurately measure how much refrigerant is being weighed into the system. If a manifold gauge set is used to check the charge, make sure to test the valve cores for leaks after disconnecting. Install port caps upon completion.
Vacuuming, Breaking the Vacuum with Refrigerant, Checking the Charge- https://youtu.be/PfdL3kZ3C6I
Adding R-410A Refrigerant Video- https://youtu.be/OSpfBXhk0nQ
If you want to learn about refrigerants and how they work in a system, check out our “Refrigerant Charging and Service Procedures for Air Conditioning” book . Test your knowledge with our 1,000 question workbook along with the answer key! We also have quick reference cards for use out in the field! Bundle Packs are a great way to save and get faster shipping! Check out www.acservicetech.com/store
Check out our free Quizzes to test your knowledge here!
Check out our Free Calculators here!
Tools that we use: www.amazon.com/shop/acservicetech
Published: 06/09/2021 Author: Craig Migliaccio

About the Author: Craig is the owner of AC Service Tech LLC and the Author of the book “Refrigerant Charging and Service Procedures for Air Conditioning”. Craig is a licensed Teacher of HVACR, Sheet Metal, and Building Maintenance in the State of New Jersey of the USA. He is also an HVACR Contracting Business owner of 16 years and holds an NJ HVACR Master License. Craig creates educational HVACR articles and videos which are posted at https://www.acservicetech.com & https://www.youtube.com/acservicetechchannel & https://www.facebook.com/acservicetech/

.png)


As someone who has experienced the headaches of an improperly installed air conditioner, I found this article incredibly informative. The step-by-step guide provided clear instructions for ensuring that the refrigerant tubing is properly installed and that the system is functioning at its best. I especially appreciated the tips for avoiding common mistakes and the safety precautions to keep in mind. Whether you're a seasoned HVAC technician or a homeowner considering a new air conditioning installation, this article is definitely worth reading. Click here to learn more!